
Finishing a basement starts with one critical step: building solid, straight, moisture-resistant walls. Done properly, basement framing creates the structure for insulation, drywall, electrical wiring, storage areas, and finished living space. Done poorly, it can lead to mold, warped studs, uneven drywall, and expensive repairs within a few years.
Many homeowners assume framing basement walls is the same as framing upstairs walls. It is not. Basements deal with concrete foundations, moisture transfer, uneven slabs, lower ceiling heights, and hidden plumbing or HVAC systems. Those conditions change how walls should be built.
A properly framed basement wall must stay dry, remain structurally stable, allow room for insulation, and comply with local building requirements. That means choosing the right lumber, leaving appropriate spacing from concrete, anchoring walls securely, and planning around utilities before a single stud is installed.
This guide covers every stage of framing basement walls, from preparation and layout to insulation planning and common mistakes. Whether you are building a home gym, office, entertainment room, or rental suite, these framing principles help create a basement that lasts for decades.
Why Proper Basement Wall Framing Matters
Basement walls sit directly beside concrete foundation walls that naturally hold moisture. Even dry basements contain humidity levels higher than upper floors. That moisture can slowly migrate into wood framing if the wall system is built incorrectly. Research and contractor guidance consistently recommend pressure-treated lumber at slab contact points and a small gap between concrete and framing to reduce moisture problems.
A well-built basement wall system serves several purposes at once:
- Supports drywall and interior finishes
- Creates cavities for insulation and utilities
- Helps control temperature and humidity
- Improves energy efficiency
- Reduces sound transfer
- Provides a level surface for finishing materials
Poor framing choices often create long-term problems hidden behind drywall. Common issues include:
- Mold growth behind insulation
- Rotting bottom plates
- Bowed or twisted walls
- Water damage after seasonal humidity changes
- Cracked drywall seams
- Cold drafts and heat loss
Most professionals now prioritize moisture management before framing begins. That includes checking for leaks, sealing cracks, improving drainage, and choosing materials suited for below-grade environments. Many contractors also avoid placing framing directly against concrete because trapped moisture can damage wood over time.
The framing stage also determines how easy later work becomes. Straight walls simplify drywall installation, cabinet mounting, trim work, flooring alignment, and electrical rough-ins. Spending extra time on layout and moisture prevention saves substantial money later.
Tools and Materials Needed for Basement Wall Framing
Before starting, organize all framing tools and materials in one area. Basement framing moves faster when measurements, fasteners, and lumber are accessible.
Essential Tools
- Tape measure
- Chalk line
- Laser level
- Framing square
- Circular saw or miter saw
- Hammer or framing nailer
- Impact driver
- Concrete drill
- Masonry bits
- Utility knife
- Clamps
- Speed square
- 6-foot level
Common Materials
| Material | Purpose |
|---|---|
| Pressure-treated 2×4 bottom plates | Moisture resistance |
| Kiln-dried studs | Wall framing |
| Concrete screws or anchors | Securing plates |
| Foam sill gasket | Moisture break |
| Rigid foam insulation | Thermal barrier |
| Fiberglass or mineral wool insulation | Wall cavity insulation |
| Vapor barrier | Moisture control |
| Construction adhesive | Additional fastening |
| Metal studs | Alternative framing option |
Most basement framing projects use 2×4 lumber spaced 16 inches on center because it matches standard drywall dimensions and provides enough support for interior finishes. Some homeowners choose 2×6 walls for additional insulation depth, especially in colder climates.
Pressure-treated lumber is especially important for bottom plates touching concrete floors because untreated wood can absorb moisture from the slab over time.
Planning the Basement Layout Before Framing
Good framing starts long before cutting lumber. Basement layouts affect airflow, storage, lighting, utility access, and future remodeling flexibility.
Begin by identifying:
- Plumbing lines
- HVAC ducts
- Electrical panels
- Support columns
- Water shutoffs
- Windows and egress openings
- Sump pump locations
Avoid boxing utilities into inaccessible spaces. Mechanical systems eventually require maintenance, and removing finished walls later becomes expensive.
Most experienced contractors snap chalk lines directly on the basement slab to establish wall placement. Laser levels help transfer layout lines to ceiling joists for perfectly aligned top plates. Uneven basement floors are common, so relying solely on concrete walls for alignment usually produces crooked framing.
Another important planning step involves deciding wall spacing from concrete foundations. Many builders leave a half-inch to one-inch gap between framing and concrete to reduce moisture transfer and improve airflow.
Think carefully about room functionality before framing starts. Home theaters require soundproofing considerations. Basement bedrooms need egress windows. Home gyms may require reinforced backing for mounted equipment. Storage rooms benefit from wider pathways and shelving support.
A thoughtful layout improves both comfort and resale value.
Preparing Basement Walls Before Framing
Framing should never begin before moisture inspection and wall preparation. Even small leaks can become major mold problems after insulation and drywall are installed.
Start by inspecting:
- Foundation cracks
- Efflorescence on concrete
- Water stains
- Damp corners
- Condensation around windows
- Floor seepage after rain
Repair any water issues first. Framing over active moisture almost always leads to hidden damage later.
Many contractors install rigid foam insulation directly against concrete before framing. This creates a thermal break and helps reduce condensation inside finished walls. Sealed foam boards also improve energy efficiency significantly.
Some homeowners install polyethylene vapor barriers, but modern basement finishing practices vary depending on climate and wall assembly design. Improper vapor barrier placement can trap moisture inside wall cavities. Several contractor discussions and field experiences warn against creating moisture traps between concrete and framing.
Humidity control matters too. Running a dehumidifier before and during basement finishing helps stabilize moisture levels. Basement humidity should generally remain below 50%.
If the concrete floor feels damp, adding a foam sill gasket beneath bottom plates creates a moisture break between lumber and concrete.
Skipping preparation work is one of the biggest reasons basement remodels fail prematurely.
Step-by-Step Process for Framing Basement Walls
Step 1: Mark the Wall Layout
Snap chalk lines where walls will sit. Double-check measurements against windows, doors, utilities, and ceiling obstructions.
Keep perimeter walls slightly away from concrete foundations whenever possible. This spacing helps reduce moisture transfer and makes walls easier to level.
Transfer floor lines to ceiling joists using a laser level or plumb bob. Accurate alignment prevents twisted walls and uneven drywall later.
Step 2: Install the Bottom Plate
Use pressure-treated lumber for all bottom plates contacting concrete. Most building professionals and contractors consider this essential for moisture resistance
Place a foam sill gasket beneath the plate for additional protection. Secure the plate using:
- Tapcon concrete screws
- Wedge anchors
- Powder-actuated fasteners
Fastener spacing commonly ranges between 24 and 48 inches depending on wall length and local requirements.
Avoid overtightening anchors because pressure-treated lumber can crack under excessive force.
Step 3: Install the Top Plate
Attach top plates directly beneath ceiling joists or blocking.
Use screws or framing nails long enough to achieve secure attachment. Basements often contain ductwork and pipes near ceiling areas, so verify all clearances before fastening.
The top plate should align perfectly with the bottom plate to maintain plumb walls.
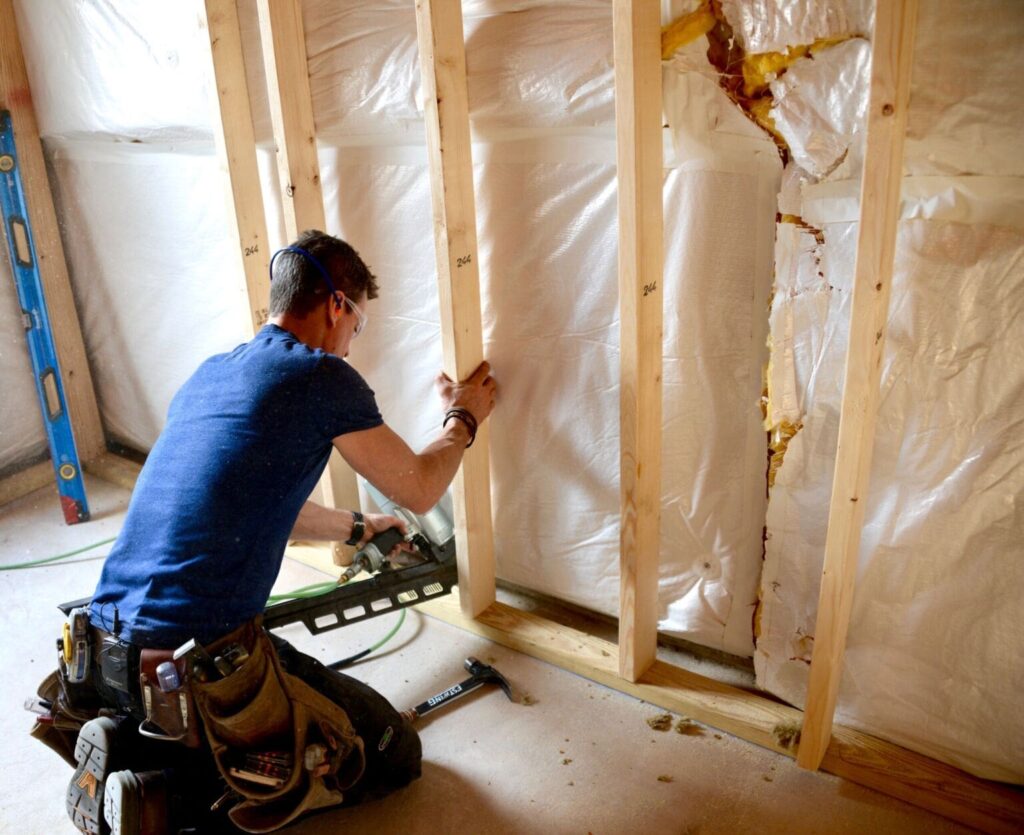
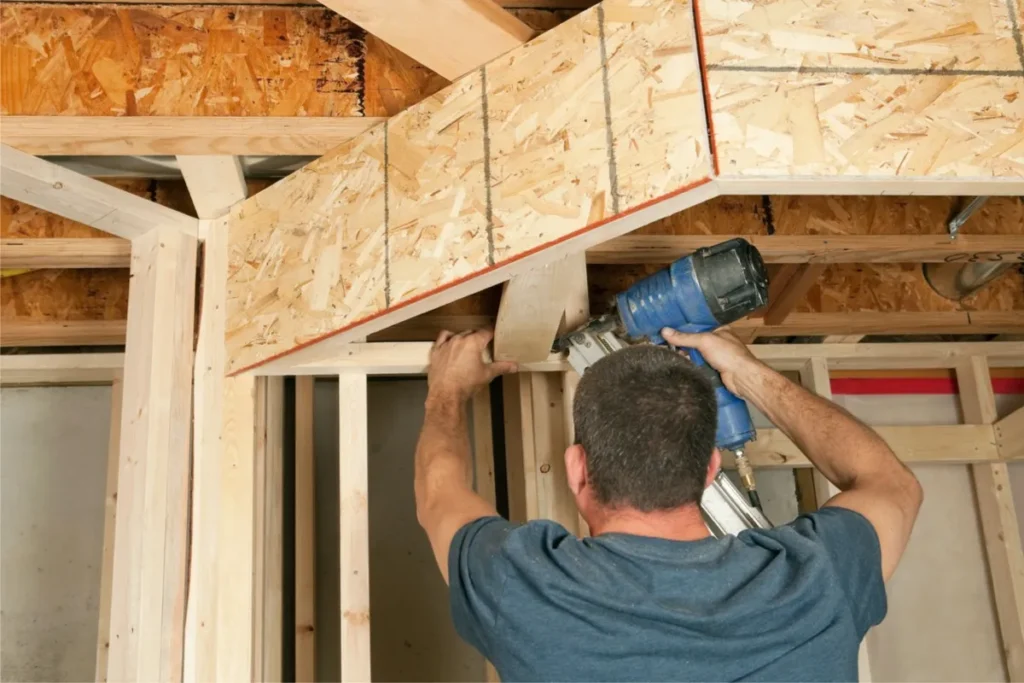
Step 4: Cut and Install Studs
Most basement walls use studs spaced 16 inches on center. This spacing supports drywall properly and simplifies insulation installation.
Measure carefully because basement slabs are rarely perfectly level. Some studs may need custom cuts.
When using wood framing:
- Crown all studs in the same direction
- Replace warped lumber
- Check walls for plumb frequently
Many DIY builders assemble wall sections on the floor and tilt them into place. Smaller sections are easier to maneuver in basements with low ceilings.
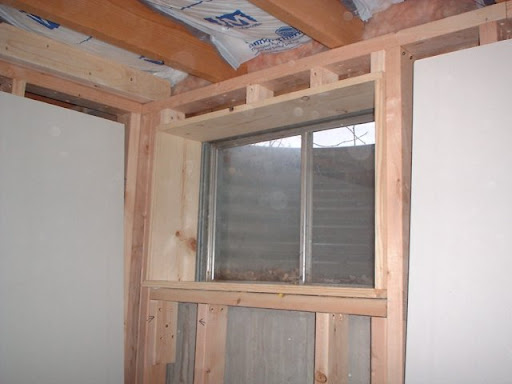
Step 5: Frame Around Doors and Windows
Doorways require:
- King studs
- Jack studs
- Headers
Basement bedrooms often require egress windows that meet local code dimensions for emergency exits.
Windows also need proper insulation and sealing because basements are vulnerable to condensation around openings.
Blocking should be added wherever future shelving, televisions, handrails, or cabinets may be installed.
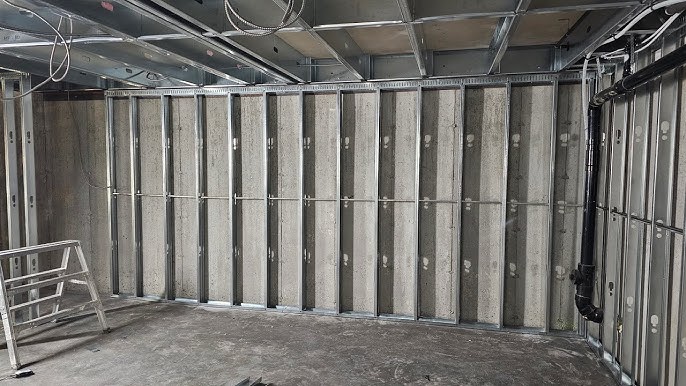
Wood Studs vs Metal Studs for Basement Walls
Choosing between wood and metal studs depends on budget, moisture levels, and finishing goals.
| Feature | Wood Studs | Metal Studs |
|---|---|---|
| Cost | Lower | Higher |
| Moisture Resistance | Moderate | Excellent |
| Ease of Cutting | Easy | Moderate |
| Strength for Hanging Items | Better | Requires special anchors |
| Weight | Heavier | Lighter |
| DIY Friendliness | Excellent | Moderate |
Wood framing remains the most popular option because it is easier for DIY projects and supports cabinetry, shelving, and trim installation more effectively.
Metal studs resist moisture and insects better, making them attractive in damp climates. Some contractors prefer metal framing near foundation walls because it reduces mold risk.
For most residential basement projects, pressure-treated bottom plates with kiln-dried wood studs provide an excellent balance between durability and cost.
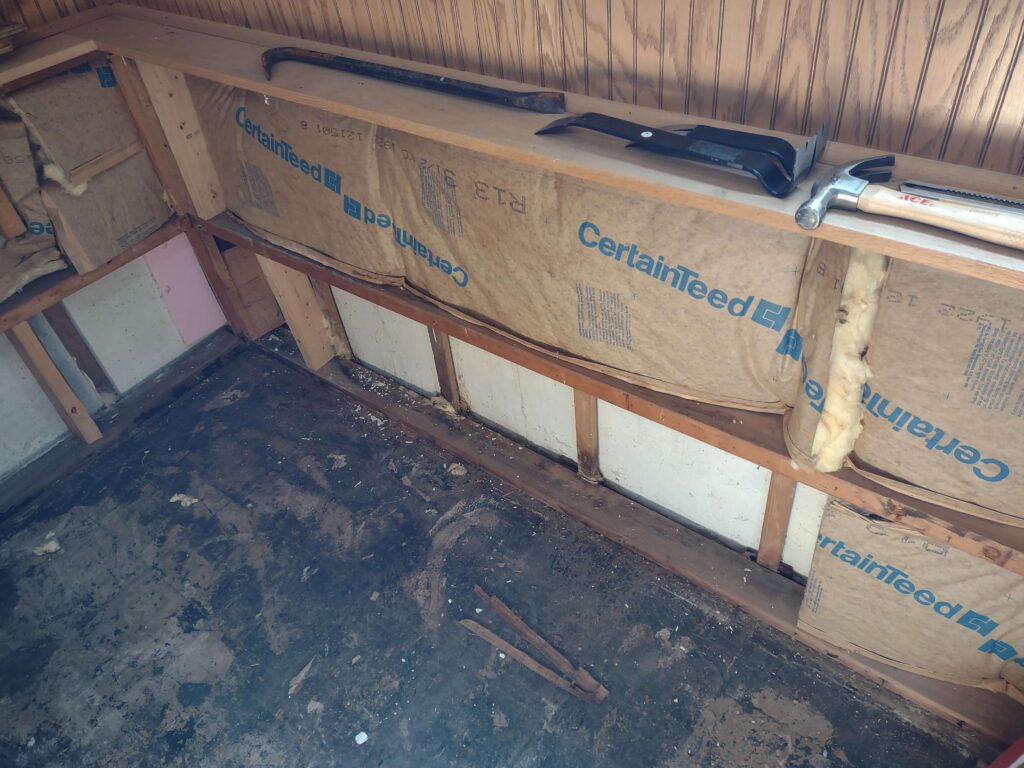
Basement Insulation and Moisture Control
Insulation choices directly affect comfort, energy efficiency, and moisture performance.
Common basement insulation systems include:
Rigid Foam Board
Installed directly against concrete walls, rigid foam helps prevent condensation and improves thermal efficiency.
Benefits include:
- Moisture resistance
- Better air sealing
- High insulation value
- Reduced thermal bridging
Fiberglass Batts
Affordable and widely available, fiberglass works well inside stud cavities when paired with proper moisture control.
Mineral Wool
Mineral wool insulation handles moisture better than fiberglass and offers excellent soundproofing.
Some modern basement wall systems combine rigid foam against concrete with mineral wool inside framing cavities. This layered approach improves energy efficiency and reduces condensation risks.
Avoid compressing insulation around plumbing or wiring because compressed insulation loses effectiveness.
Common Basement Framing Mistakes
Many basement framing problems are preventable.
Framing Directly Against Concrete
Wood touching concrete absorbs moisture over time. Leaving a gap improves drying potential and airflow.
Using Untreated Bottom Plates
Untreated lumber on basement slabs often warps, rots, or molds within several years. Pressure-treated lumber is strongly recommended.
Ignoring Moisture Problems
Finishing over damp walls traps water behind drywall and insulation.
Crooked Layout Lines
Poor layout work creates uneven drywall seams and trim installation problems.
Blocking Access to Utilities
Water shutoffs, junction boxes, and cleanouts should remain accessible.
Skipping Fire Blocking
Some jurisdictions require fire blocking in concealed wall cavities for safety.
Incorrect Vapor Barrier Placement
Improper vapor barrier installation can trap moisture instead of controlling it. Climate-specific approaches matter.
Cost to Frame Basement Walls
Basement framing costs vary based on:
- Basement size
- Lumber prices
- Ceiling height
- Metal vs wood studs
- Insulation type
- Labor rates
Average Basement Framing Costs
| Basement Size | DIY Cost | Professional Cost |
|---|---|---|
| 500 sq ft | $1,200–$2,500 | $3,500–$6,000 |
| 1,000 sq ft | $2,500–$5,000 | $7,000–$12,000 |
| 1,500 sq ft | $4,000–$7,500 | $10,000–$18,000 |
DIY framing reduces labor expenses substantially, but mistakes involving moisture or structural alignment can become expensive later.
Many homeowners hire professionals for layout and anchoring while handling insulation and drywall themselves.
Professional Tips for Better Basement Framing
Experienced contractors often follow several practices that improve long-term durability.
Leave Space for Airflow
Walls pressed tightly against concrete trap moisture.
Use a Laser Level
Laser levels dramatically improve wall alignment and reduce drywall issues.
Plan Electrical Early
Outlet spacing, lighting, and media wiring should be considered before framing begins.
Add Extra Blocking
Future shelving, televisions, and handrails require solid backing behind drywall.
Choose Moisture-Resistant Materials
Moisture-resistant drywall and insulation products help extend basement longevity.
Keep Mechanical Access Open
Access panels save major headaches during future repairs.
Check Local Building Codes
Requirements for insulation, egress windows, and vapor barriers vary by region.
Best Basement Wall Framing Configuration
For most modern finished basements, contractors commonly recommend this assembly:
- Concrete foundation wall
- Rigid foam insulation
- Small air gap
- Pressure-treated bottom plate
- Wood or metal studs
- Mineral wool or fiberglass insulation
- Drywall
This approach balances moisture management, insulation performance, and finishing flexibility.
Homes in colder climates may require thicker insulation assemblies or 2×6 framing for higher R-values.
Frequently Asked Questions
Should basement walls touch concrete?
No. Most professionals recommend leaving a small gap between framing and concrete foundation walls to reduce moisture transfer and improve airflow.
Do basement bottom plates need pressure-treated lumber?
Yes. Pressure-treated lumber is strongly recommended because basement slabs can transfer moisture into untreated wood over time.
What is the best stud spacing for basement walls?
Sixteen inches on center is the most common spacing because it aligns with drywall installation standards and provides strong wall support.
Are metal studs better for basements?
Metal studs resist moisture and insects better than wood. However, wood studs remain easier for most DIY projects and support mounted items more effectively.
Should I insulate basement walls before framing?
Many contractors install rigid foam insulation directly against concrete before framing because it improves energy efficiency and reduces condensation risk.
How much gap should exist between concrete and framing?
Most builders leave between half an inch and one inch of space between framing and concrete walls.
Can I frame basement walls myself?
Yes, many homeowners complete basement framing successfully with proper planning, tools, and moisture management knowledge. Complex layouts or structural modifications may require professional help.

